

If you sell on Shopify, you already know navigation quietly determines your revenue. A customer lands on your page, glances at the menu bar, and within seconds either starts browsing — or leaves. Yet most Shopify stores still use their theme's default menu: a flat list of links designed for desktop, squeezed onto mobile, and identical to thousands of other stores.
Navi+ is a navigation toolkit built specifically for Shopify storefronts. Instead of one menu type, you get a complete system: Tab Bar at the bottom for mobile, Mega Menu for desktop, Mobile Menu for depth, Floating Button for promotions, and Icon Menu for large catalogs. All managed from one dashboard. No code, no theme edits, no developer needed.
This guide covers everything Navi+ does on Shopify — what it replaces, plus how to install and how to upgrade your plan.
Why Shopify's default menu costs you sales
Shopify's built-in menu was designed when most traffic came from desktop. Today roughly 70% of Shopify traffic is mobile — but the default menu hasn't changed much:
- No bottom navigation. Every app you use anchors its main features to a fixed bottom bar where thumbs reach easily. Shopify's default menu still hangs from the top.
- Only hamburger on mobile. A customer taps to open, scrolls through a long list, taps again — three or four actions just to start shopping.
- Design locked to theme. Want bigger touch zones, custom icons, or multi-column layouts? You have to edit Liquid.
- No room for promotions. Flash sales appear, but the menu can't show them; categories need image badges, but the menu won't hold them.
Navi+ menu system on Shopify
Tab Bar — bottom navigation for mobile
A fixed bar at the bottom with up to five destinations: Home, Categories, Search, Cart, Account. Custom icons, active state, cart badge count, and a library of over 4,000 Google Material Symbols icons. This is the biggest change for most stores moving off the default theme.
Mega Menu — dropdown for desktop
Multi-column dropdown rich with images for large catalogs. Add group headers, links, promotional banners, featured product blocks, and CTAs.
Slide / Hamburger Menu
When mobile needs depth — large catalogs with multiple levels, language selection, account links — a smooth panel slides in from left or right.
FAB — floating action button
A single floating button anchored to a corner. Perfect for promotions, priority actions, or quick menu access. Customize color, icon, label, and action.
Grid Menu
Grid-based menu for stores with many categories — a full-screen layout of 9–12 large tiles instead of a long scrolling list.
Replace default theme drawers and components
From the Business plan and up, Navi+ can replace your theme's Search drawer, Cart drawer, and main menu with fully customized versions — different button, completely different design.
Mobile and desktop with separate configs
Each menu is configured separately for mobile and desktop. Show Tab Bar on mobile and Mega Menu on desktop — completely independent — no media query needed.
Built for Shopify storefronts, not a temporary patch
- Theme-independent. Works on Dawn, Refresh, Sense, Impulse, Prestige, Empire, and custom themes. Menu lives outside Liquid markup — theme updates or changes don't touch your menu.
- No theme edits. Install from Shopify App Store, enable the App Embed block in Online Store 2.0, and Navi+ injects itself. Remove it with one switch.
- Pure HTML5 + CSS3, zero JS dependency. No script conflicts with themes, no breakage after updates.
- Mobile-first. Every template optimizes spacing, font size, and touch zones for phones first.
- Editor outside Shopify admin. Dashboard runs on a separate app at
dash.naviplus.app— fast, access from any device.
Install Navi+ on Shopify — step by step
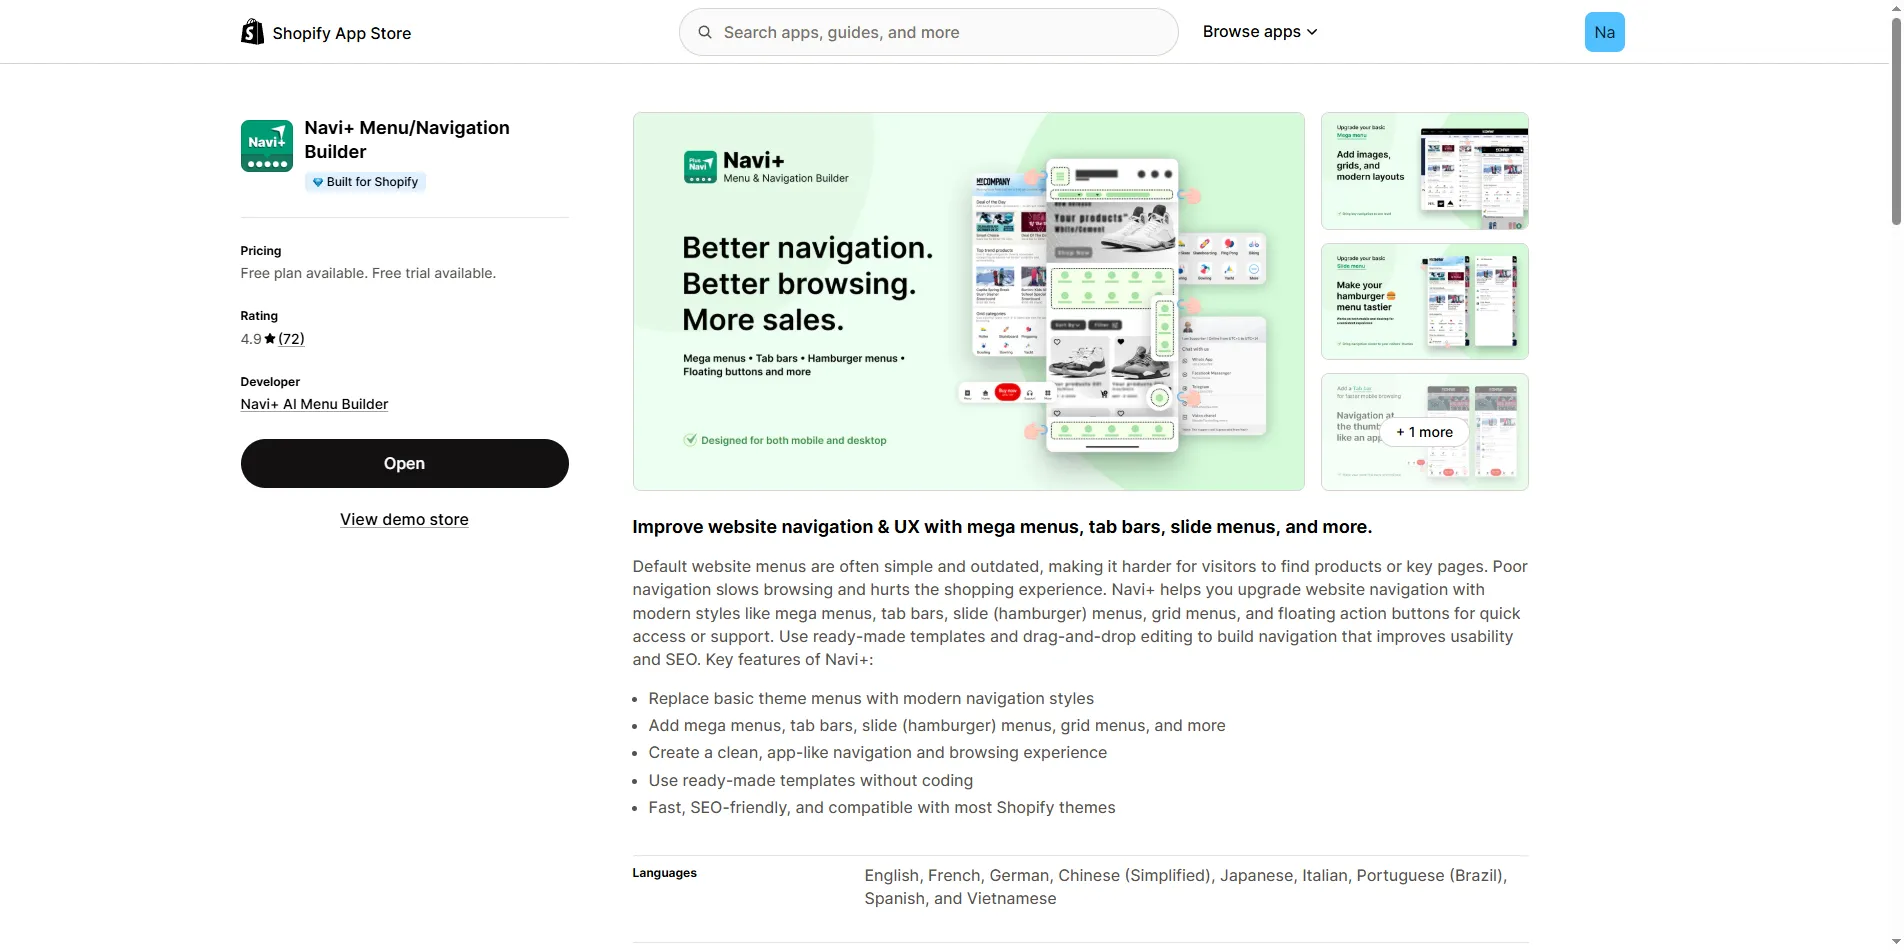
Go to Navi+ on Shopify App Store, click Add app and approve installation in your Shopify admin. No charge yet — Starter is free forever.
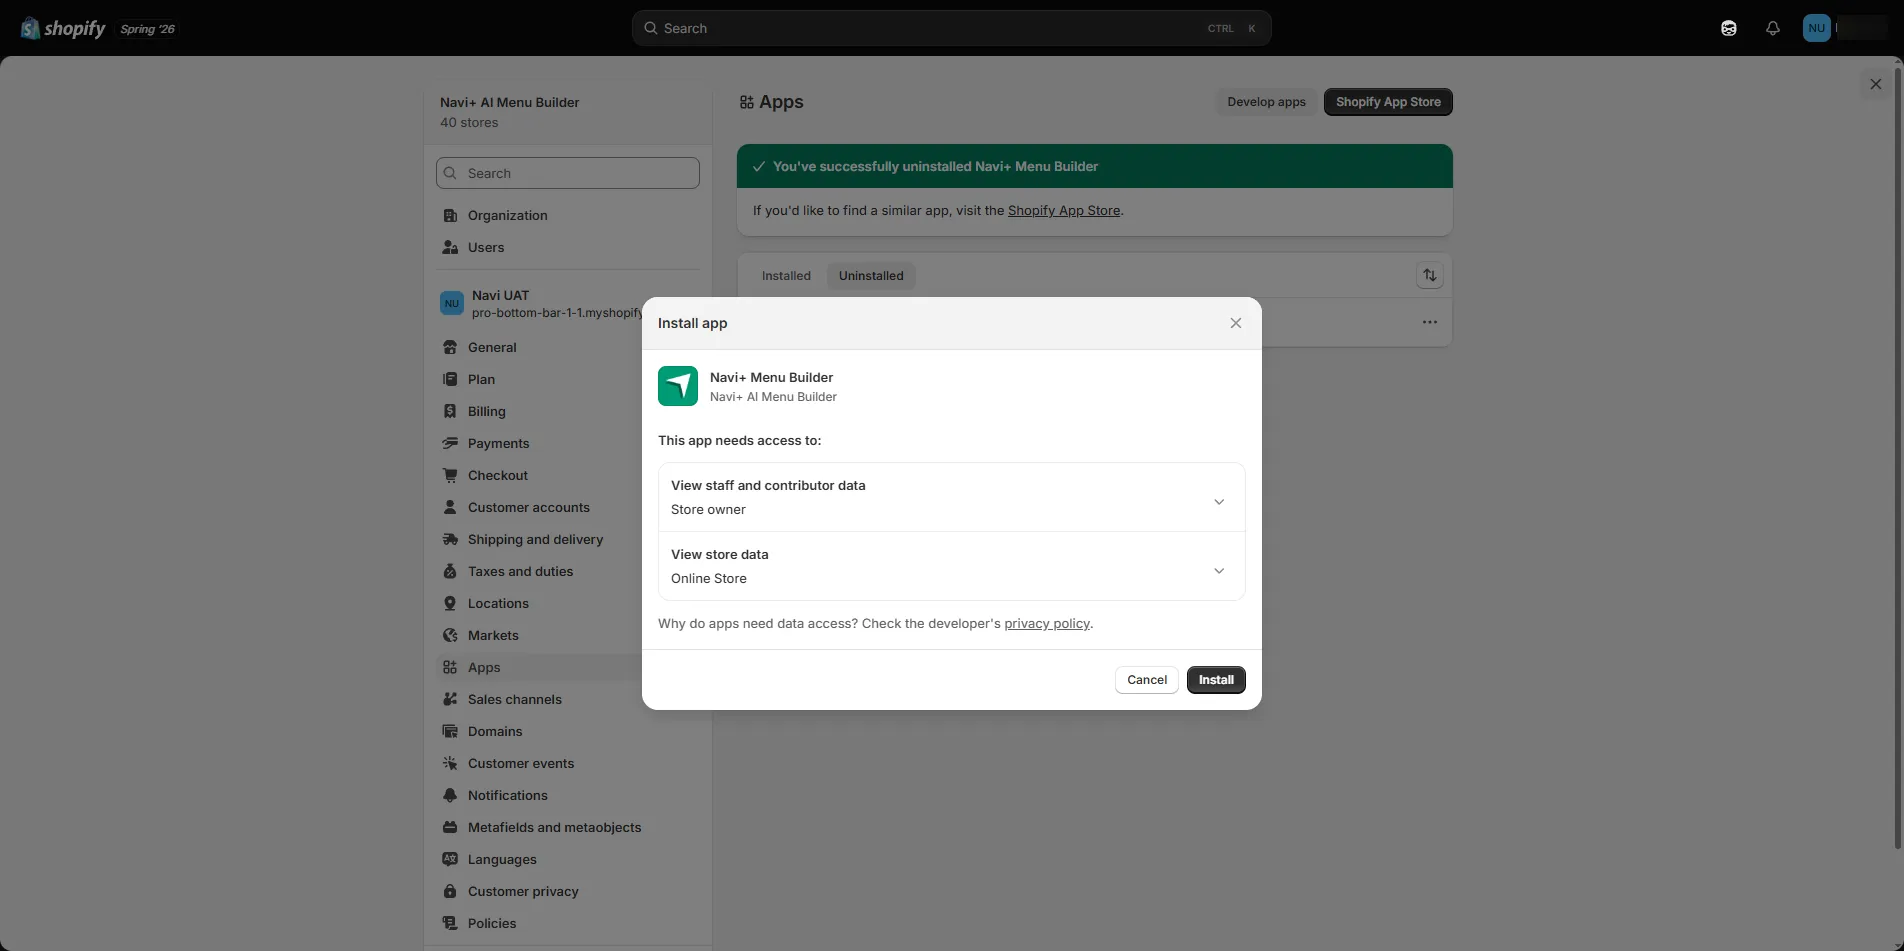
Shopify shows the app's permissions screen. Click Install to approve — no charge yet, Starter is free forever.
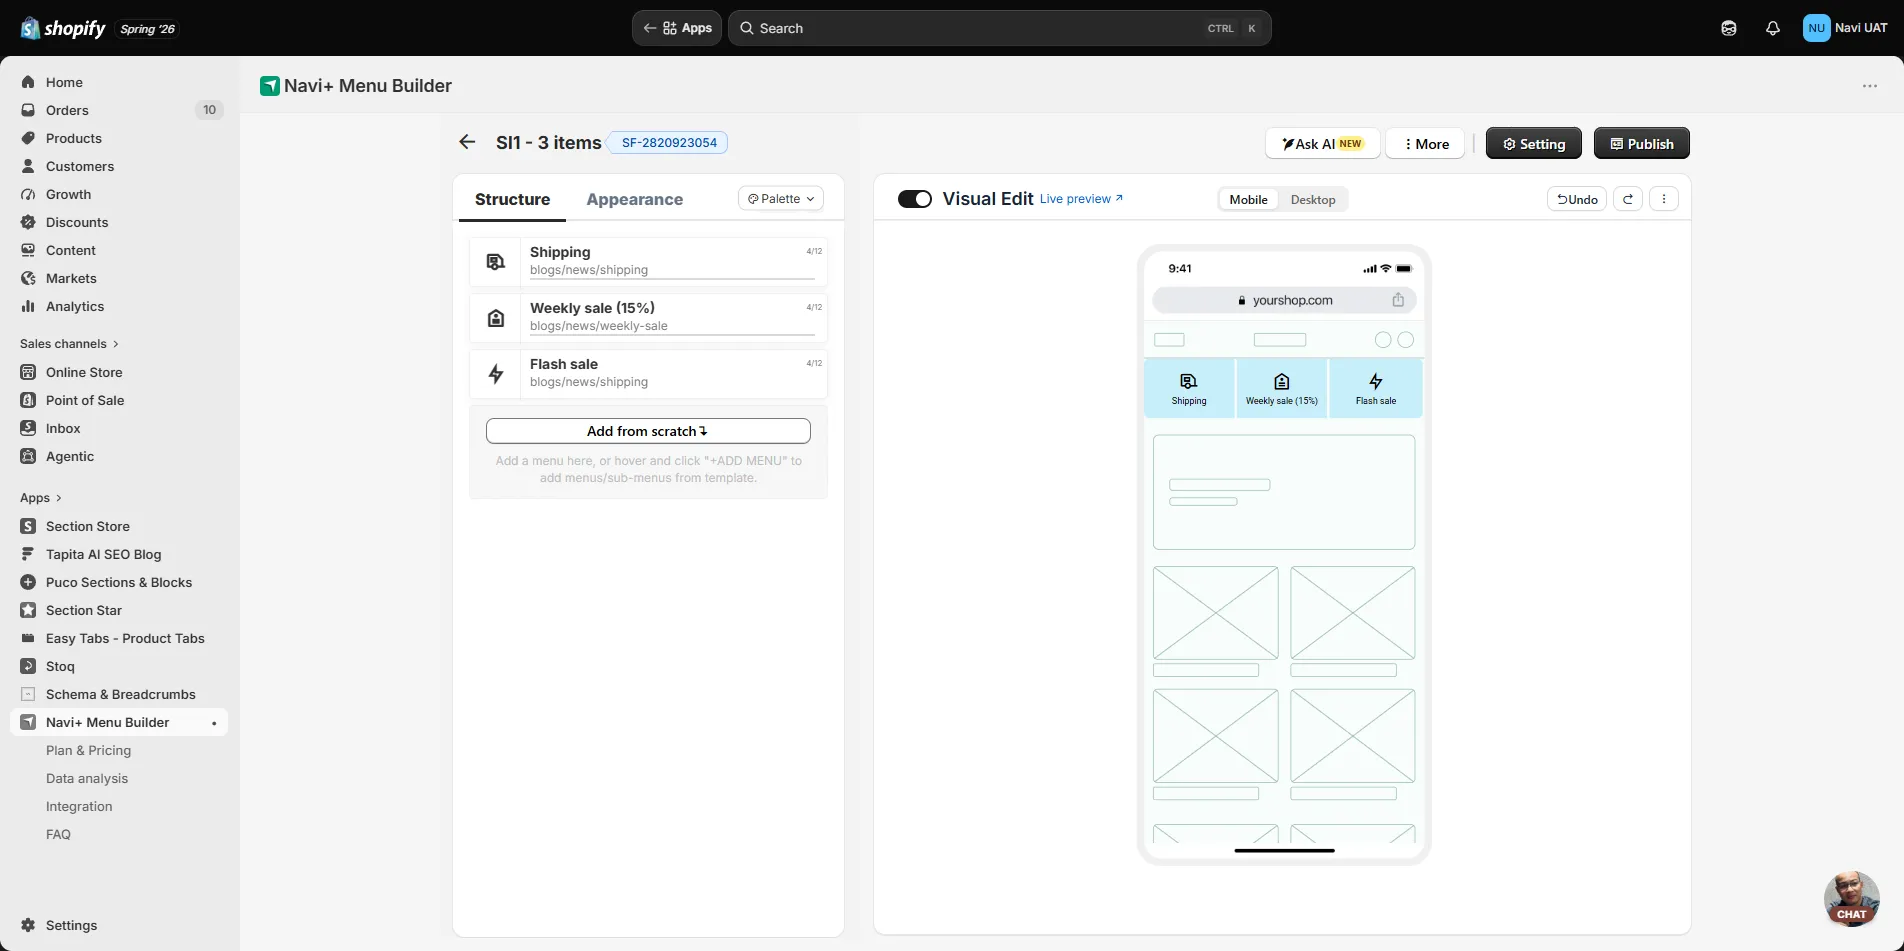
Open the dashboard at dash.naviplus.app, enable the App Embed block so Navi+ displays on your storefront. Pick a template, choose your menu type (Tab Bar, Mega, Slide, FAB, Grid), customize icons and links, then click Publish. Your storefront updates instantly — no theme reload, no cache clear.
Most stores go from install to live menu in under five minutes. See detailed usage guides at Navi+ Help Center.
Upgrade your plan on Shopify
On Shopify, billing is handled by Shopify Billing and upgrades happen inside Navi+ — no credit card entry elsewhere. Because each transaction ties to your specific store, upgrades must start from within the app (opened from Shopify admin), not pushed directly from the website.
In Shopify admin → Apps → open Navi+ (or go directly to dash.naviplus.app).
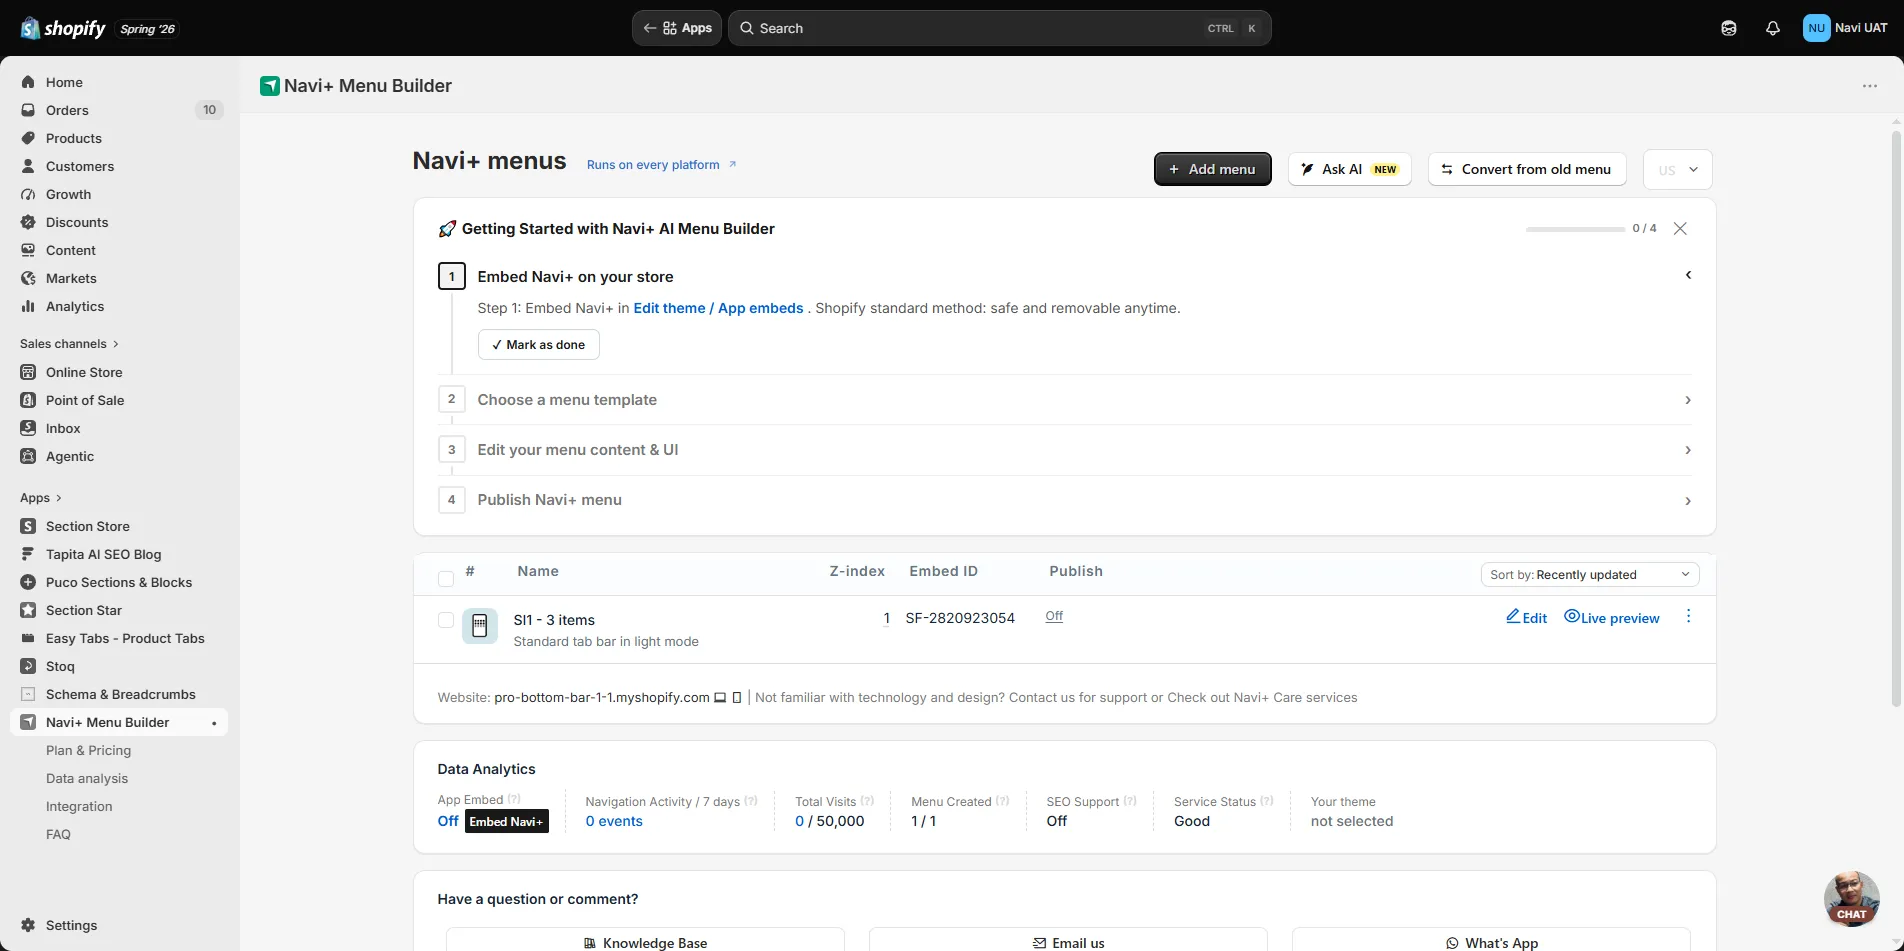
Inside Navi+, open the Plan & Pricing tab to see your current plan and available upgrades (Business, Elite).
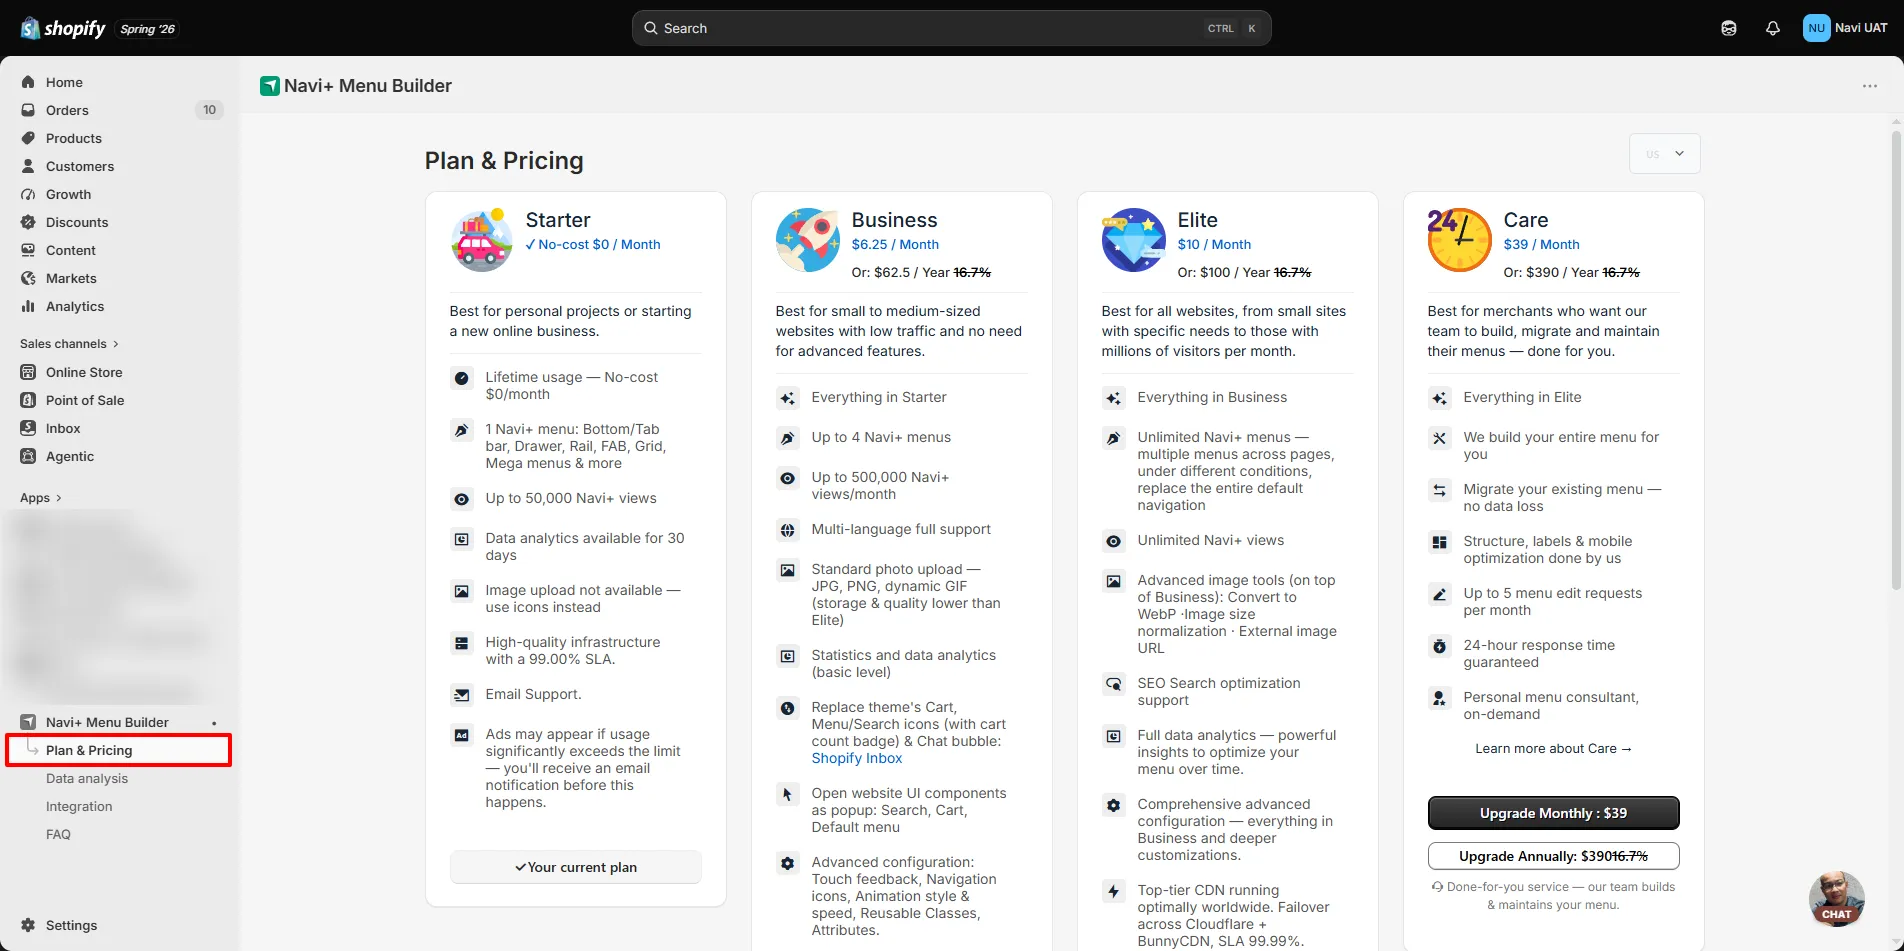
Click Upgrade on your desired plan. Shopify shows a billing confirmation screen (Approve subscription) — confirm and you're done. Both paid plans include a 14-day free trial.
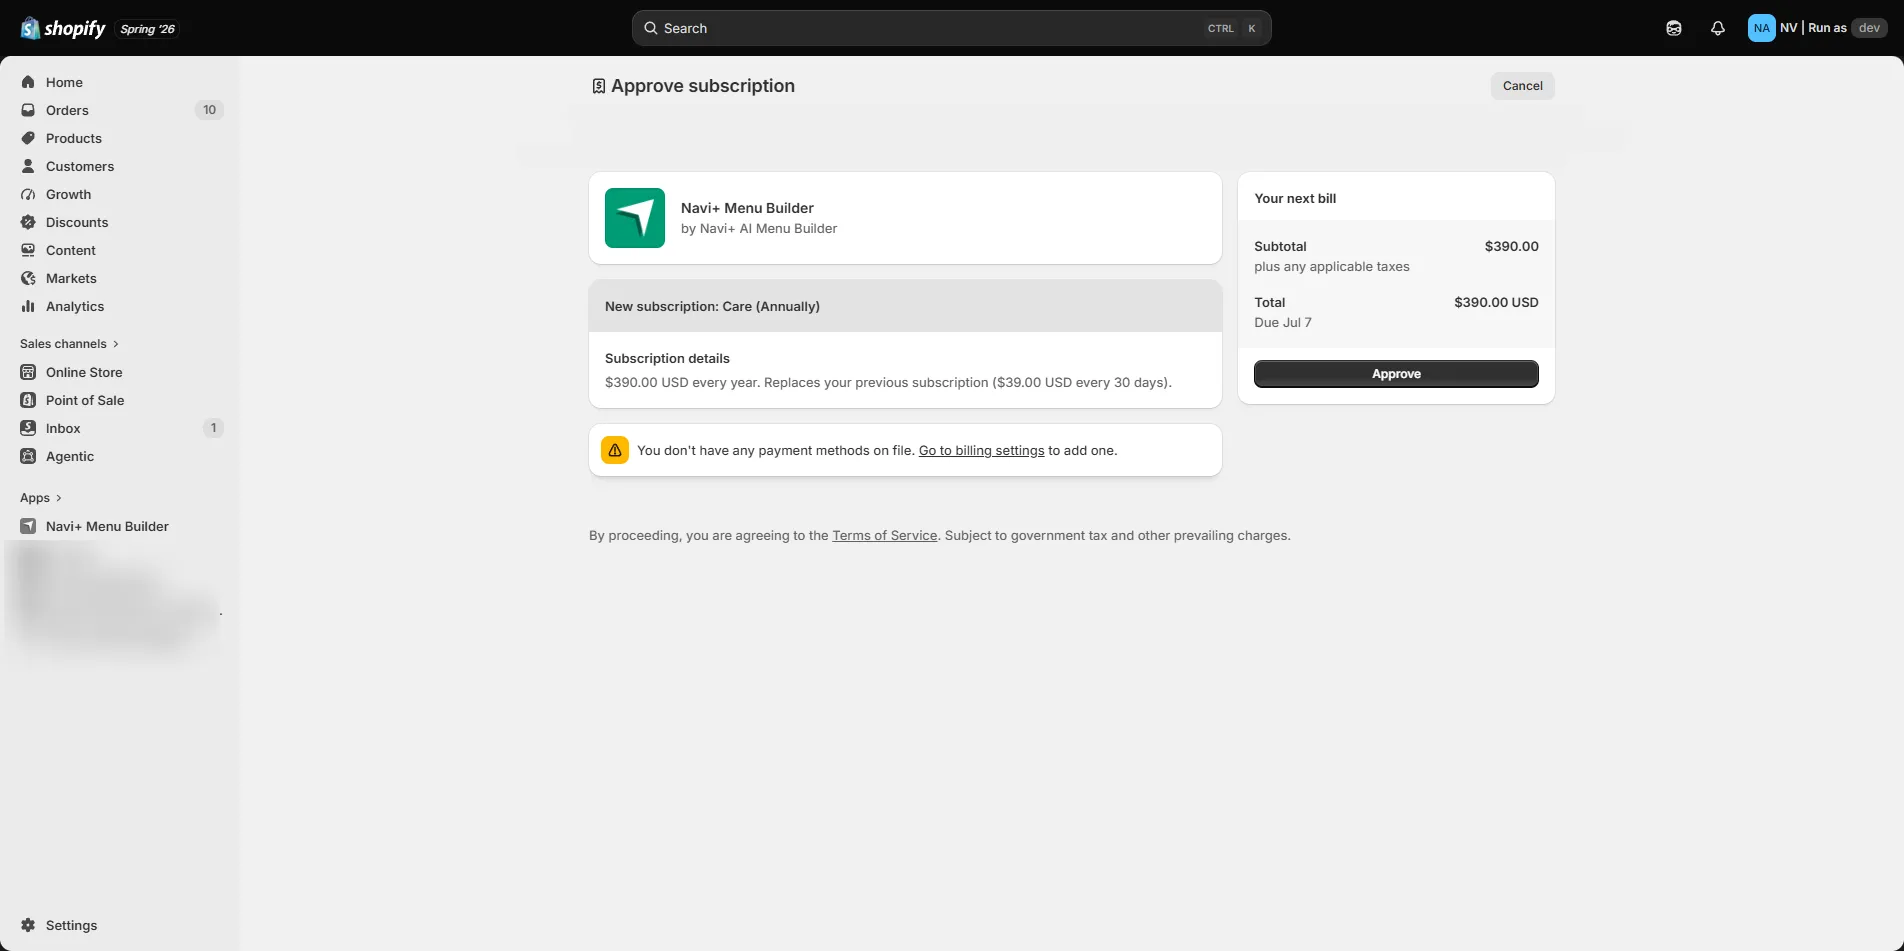
After approval, new plan features (multiple menus, multi-language, image uploads, analytics, etc.) unlock immediately in Navi+.
Plans on Shopify
Same plans across all platforms — same features, same price.
| Plan | Price | Best for |
|---|---|---|
| Starter | Free forever | One menu, small stores, testing Navi+ |
| Business | $6.25 / month | Growing stores, multiple menus, multi-language, image uploads, analytics |
| Elite | $10 / month | Large catalogs, unlimited menus, full SEO, premium CDN, dedicated support |
Both paid plans include a 14-day free trial — no credit card, full feature access.
Common questions
Does installing Navi+ slow down my store?
No. Navi+ prioritizes mobile, uses no external JavaScript libraries, defers loading after the first paint, and serves through a global CDN — no render-blocking scripts, Core Web Vitals protected.
Do I need to know code?
No. Drag-and-drop dashboard with built-in templates. Custom CSS/HTML/JS is available if you want it, but most stores never need to touch it.
Does it work with my theme?
Yes. Navi+ sits outside your theme, runs on all official and custom themes; theme updates or changes have no impact on your menu.
Can I upgrade my plan from naviplus.io?
Upgrades must start inside the app (tied to your store via Shopify Billing). Open Navi+ from your Shopify admin, then go to Plan & Pricing.
Get started on Shopify
Free to install — no credit card needed. Running in minutes. Same plans as all platforms.
Install on Shopify — Free